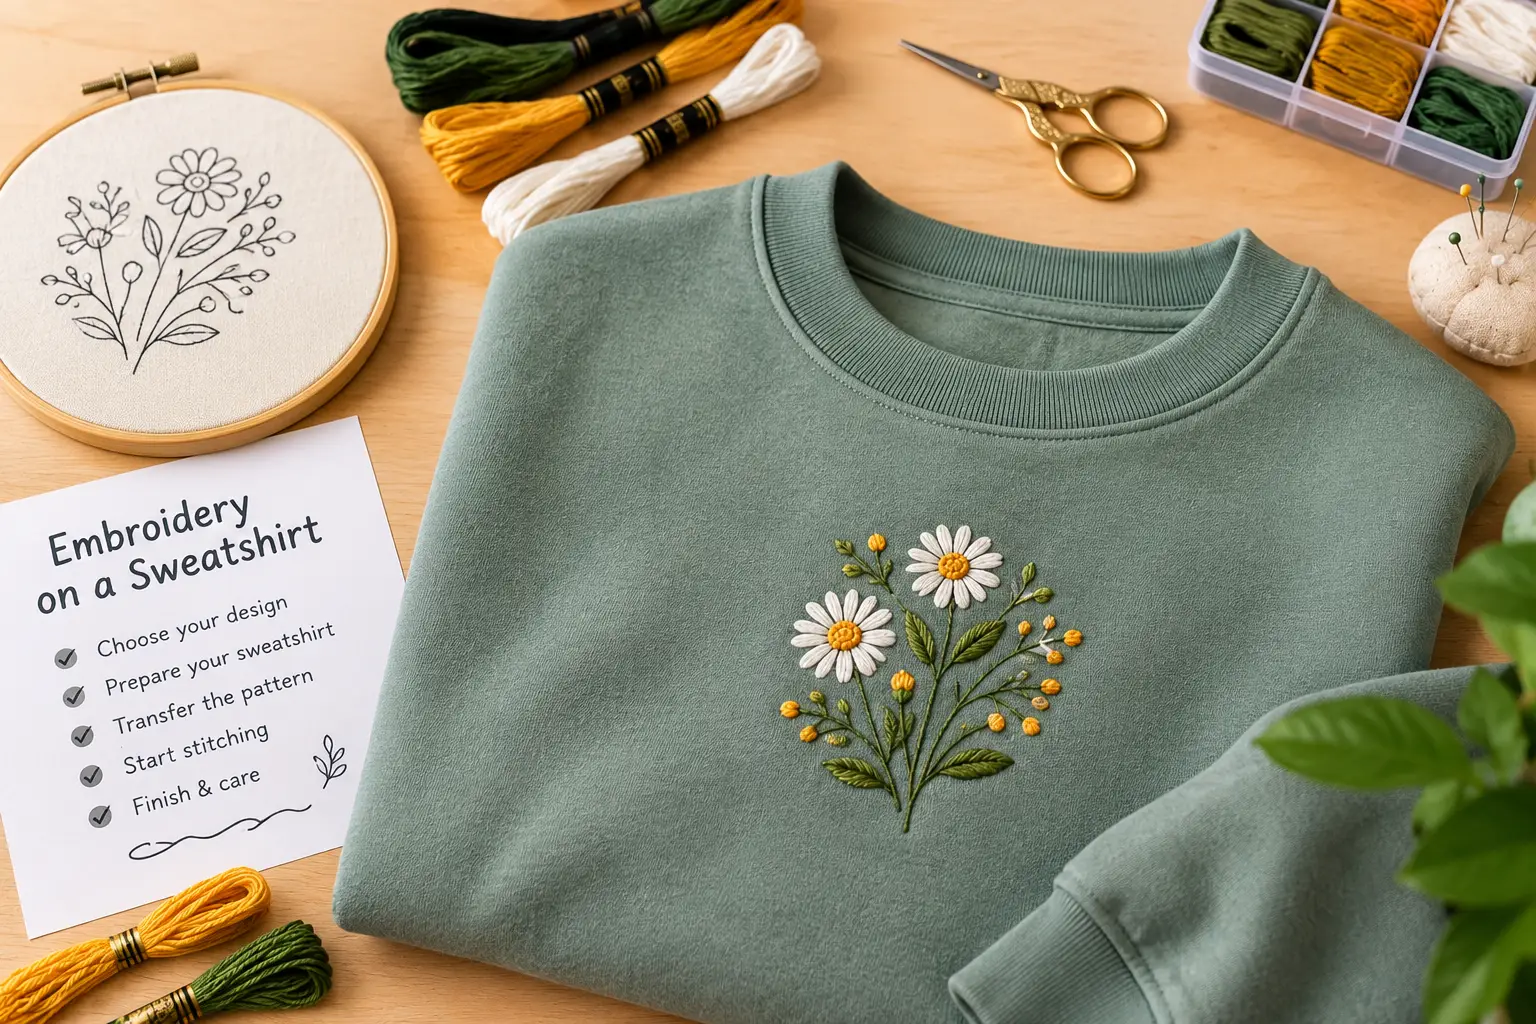
Learning how to embroider on a sweatshirt requires a suitable design, the right stabilizer, and careful fabric control. Sweatshirt fleece is thicker and stretchier than woven cotton, so preparation matters. With a home embroidery machine or hand needle, you can create a custom motif, name, border, or sleeve detail. Quality Care Digitizing can help prepare stitch-ready artwork.
1. Choose a Sweatshirt and Design
Select a sweatshirt with a smooth surface and enough room for your design. Cotton and cotton-polyester blends work well. Wash and dry a new sweatshirt according to its care label; preshrinking reduces fit changes and removes excess dye. Avoid fabric softener because residue can affect adhesion.
Choose artwork that suits the garment’s weight and your skill level. Simple lettering, small florals, geometric motifs, and medium-density designs work well for beginners. Dense fills can stiffen fleece or cause puckering. Check stitch count and finished dimensions. Designs digitized for lightweight shirts may need adjustments for sweatshirt fabric. Quality Care Digitizing can help prepare embroidery artwork that suits the fabric, garment, and intended stitch area.
2. Gather the Right Supplies
For machine embroidery, prepare these materials:
A sweatshirt and a compatible embroidery design.
Cutaway stabilizer, usually medium weight, around 2.5 ounces (71 grams) per square yard.
Temporary spray adhesive suitable for fabric.
An air-erase pen, tailor’s chalk, or another removable marking tool.
An embroidery hoop that fits the design and your machine.
A size 75/11 embroidery needle, embroidery thread, and small scissors.
Clips to secure excess fabric away from the needle.
Optional water-soluble topping and soft backing for comfort.
For hand embroidery, use floss, a suitable hand needle, a small hoop, and water-soluble stabilizer or transfer paper. Read product instructions before applying heat, spray, or water. Test pens and adhesives on an inconspicuous area. Test matching fleece first to check tension, density, thread color, and stabilizer compatibility before your project starts.
3. Where Should You Place an Embroidery Design on a Sweatshirt?
For a standard center-chest design, place the top of the artwork about 3 inches (7.6 centimeters) below the neckline. A smaller child-size sweatshirt may look better with the top edge around 2.5 inches (6.4 centimeters) below the neck. Treat these measurements as starting points; garment size and artwork proportions affect the final position.
Borders, horizontal designs, and groups of three small motifs often suit the chest. Place small motifs on a pocket, sleeve, or upper back. On a zippered sweatshirt, keep artwork clear of the zipper.
Print a full-size template from embroidery software, or create a matching paper outline. Position it on the flat garment. Fold the sweatshirt vertically to find its center, then mark the center and horizontal and vertical axis lines with an erasable pen. These marks help align the artwork in the hoop.
4. What Stabilizer Should You Use for Sweatshirt Embroidery?
Use a medium-weight cutaway stabilizer for most machine embroidery on sweatshirts. Cutaway backing supports knit fabric through wear and washing, reducing stretching, puckering, and distortion. No-show mesh cutaway provides less bulk.
For hand embroidery, a water-soluble stabilizer can transfer a pattern and support stitches. Water-soluble topping helps keep stitches visible on fleece. Topping does not replace backing stabilizer.
Avoid relying on tearaway stabilizer alone for a stretchy sweatshirt or dense design. Tearaway may remove too much support when you pull it away. If the sweatshirt is lightweight or the design is unusually dense, test a sample on similar fabric before stitching the final garment.
5. How Do You Hoop a Sweatshirt for Embroidery?
Hoop the stabilizer and garment without stretching the sweatshirt. Excess tension can make the fabric contract after you remove the hoop, leaving ripples around the design. For a bulky garment, floating the sweatshirt over a hooped stabilizer is often easier than forcing all layers into the hoop.
Turn the sweatshirt inside out. Cut a piece of cutaway stabilizer larger than the hoop area, apply temporary adhesive according to the product directions, and smooth the stabilizer onto the wrong side of the embroidery area. Avoid overspray and let the adhesive reach the recommended tack level.
Turn the garment right side out and slide the outer hoop inside. Align the center and axis marks with the hoop, then place the inner hoop over the layers. Tighten until secure without stretching the knit. Check that stabilizer lies flat beneath the design.
If the sweatshirt’s back catches on a flatbed machine, roll the extra fabric aside and clip it securely. Keep the back panel, sleeves, hood, drawstrings, and hem outside the stitching field. Confirm that only the intended layer sits beneath the needle.
6. Machine Embroidery on Sweatshirts: Step by Step
Step 1: Check the machine setup. Fit a fresh size 75/11 embroidery needle, thread the machine, and load the correct design file. Confirm the design fits the hoop and that the machine's needle path clears the hoop edges. Proper embroidery file preparation helps you check design dimensions and machine compatibility before stitching.
Step 2: Add a topping when needed. Lay water-soluble topping over fleece with a raised or fluffy surface. Keep the topping flat so it does not fold into the stitches. Use the product’s removal method after stitching.
Step 3: Run a placement check. Use the machine’s trace or basting function if available. Watch the needle path and verify that no extra fabric enters the hoop area. Reposition the hoop before stitching if the outline sits incorrectly.
Step 4: Stitch at a controlled speed. Let the machine stitch without pulling or pushing the sweatshirt. Pause if fabric shifts, thread breaks, or the needle catches a fold. A slower speed can help with thick fleece.
Step 5: Remove temporary materials. Once stitching is complete, take the garment out of the hoop and remove the topping as directed. Turn the sweatshirt inside out and trim the cutaway stabilizer, leaving about 0.5 inch (1.3 centimeters) around the design. Do not cut close to the stitches.
7. How to Hand Embroider a Sweatshirt
Hand embroidery works well for names, initials, small flowers, and simple line-art motifs. Transfer the pattern with a removable pen or draw it on water-soluble stabilizer. Secure the stabilizer to the sweatshirt, then place the area in a hoop with gentle tension. Keep the knit fabric relaxed rather than stretching it tightly.
Use floss and a needle that passes through the fabric without leaving large holes. Start with three strands; thread thickness and design detail may require fewer or more. Choose short backstitches for lettering and outlines, or short-and-long stitches for filled shapes. Avoid long satin stitches across stretchy areas because the thread can pull the fabric out of shape.
Keep the back of the garment free from knots and long thread tails. Finish each section securely without pulling the stitches too tight. Remove water-soluble stabilizer according to its instructions, allow the sweatshirt to dry flat, and check the fabric for puckering before you wear it.
8. Finish the Inside and Care for the Sweatshirt
A soft embroidery backing can cover rough thread ends and reduce irritation against the skin. Use a backing designed for clothing and follow its heat or adhesive instructions, especially on fleece blends that may be sensitive to high temperatures. Trim loose threads carefully and make sure no stabilizer edge cuts into the design.
Press from the inside or through a pressing cloth at a temperature allowed by the label. Avoid raised stitches. Wash inside out with mild detergent, avoid rubbing the embroidery, and dry as the care label permits.
9. Common Sweatshirt Embroidery Problems
Puckering around the design: Use cutaway stabilizer, reduce hoop tension, and confirm that the fabric was not stretched during hooping. Dense artwork may need digitizing adjustments, which professional embroidery digitizing services can help address.
Stitches disappear into fleece: Add water-soluble topping and check whether the design has suitable stitch density and underlay.
The back of the sweatshirt gets stitched: Stop the machine immediately, remove the hoop carefully, and separate the trapped layers. Roll and clip the garment more securely before restarting.
The design feels stiff: Choose a less dense design, use an appropriate stabilizer weight, and trim the backing without cutting too close to the stitches.
The placement looks crooked: Mark the center and axis lines, use a full-size template, and check alignment while the garment lies flat before hooping.
Frequently Asked Questions
What do you need to embroider on a sweatshirt?
You need a sweatshirt, an embroidery design, suitable stabilizer, marking tool, and either an embroidery machine or hand needle and floss. Machine projects usually require a hoop, thread, size 75/11 needle, temporary adhesive, scissors, and optional water-soluble topping.
How can I make embroidery on a sweatshirt at home?
You can embroider a sweatshirt at home with a hand needle or embroidery machine. Prewash the garment, mark the design placement, stabilize the fabric, and stitch without stretching the knit. Trim the backing carefully and protect the inside for comfortable wear.
How to embroider a name on a sweatshirt?
To embroider a name, choose a clear lettering design and place the name on the chest, sleeve, or near a pocket. Mark the baseline, stabilize the sweatshirt, and use a suitable needle and thread. Test small lettering first to confirm legibility.
What stabilizer to use when embroidering a sweatshirt?
Use medium-weight cutaway stabilizer for most machine embroidery because the backing supports stretchy knit fabric after washing. Add water-soluble topping when fleece texture may hide stitches. For hand embroidery, water-soluble stabilizer can support pattern transfer and help keep the fabric steady.
Halloween embroidery patterns let you create seasonal decorations, personalized gifts, clothing details, and small handmade keepsakes with basic needlework skills. You can choose cute ghosts, black cats, pumpkins, bats, witch hats, cobwebs, or detailed haunted houses, then adapt the colors and stitches to your project. For beginners, simple outlines and...
An embroidered beanie adds a personal touch to your winter wardrobe with custom flowers, initials, leaves, or geometric designs. You can embroider a knit beanie by hand with embroidery floss, a needle, and a suitable stabilizer, or use an embroidery machine for more detailed designs. The key is to control...
Embroidery thread colors affect design visibility, brand consistency, texture, and the appearance of finished stitches. The right shades help you reproduce logos accurately, create realistic artwork, and coordinate embroidery with fabric. An embroidery thread colors chart helps you identify shades by number, name, and color family, while conversion charts help...
Bulk Christmas gift orders come with tight deadlines. Speed and accuracy matter more than ever during the holiday season. Vector artwork helps businesses complete large orders faster without sacrificing quality. Clean Artwork Reduces Preparation Time Vector files arrive clean and organized. They do not require heavy cleanup or redraws. This...
Christmas gifts need to look clean, polished, and professional. Vector files play a major role in achieving that quality. Without proper vectors, even the best gift idea can lose its premium feel. Clean Designs Start with Vector Artwork Vector files use smooth paths instead of pixels. This keeps artwork sharp...
Last-minute Christmas gifts still need to look thoughtful and premium. Digitizing makes fast customization possible without sacrificing quality. When time is short, embroidery digitizing delivers reliable and professional results. Why Digitizing Is Ideal for Urgent Christmas Orders Digitized embroidery runs quickly once files are ready. There is no drying time...
Christmas gifts should feel special the moment someone sees them. Digitized embroidery adds that premium touch through clean stitching and rich detail. Unlike basic decoration, professional digitized embroidery transforms simple items into high-end holiday gifts. Premium Gifts Start with Professional Digitizing Embroidery quality depends on how well a design is...
Are you searching for professionally digitized Christmas embroidery patterns ready for immediate use? There's no need to waste time with poor-quality designs or DIY digitizing struggles! A comprehensive pattern library with professionally prepared files saves time and ensures consistent quality. This guide will show you what makes a premium pattern...
Are you attempting to embroider intricate complex Christmas tree embroidery patterns this holiday season? There's no need to struggle with poor digitizing results! Quality digitizing transforms complex tree patterns into stunning embroidered artwork that customers treasure. This guide will teach you how professional digitizing makes the difference based on technical...