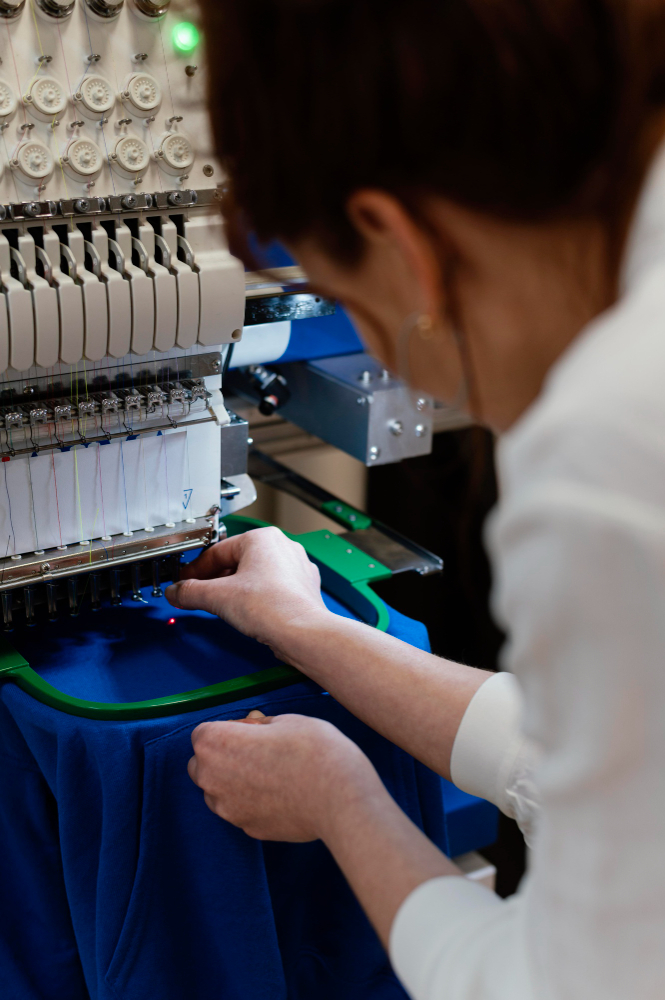
When it comes to turning your design into embroidery, proper preparation of your artwork is crucial. Whether you’re a brand owner looking to create custom apparel or a designer working with a digitizing service, understanding the basics of artwork preparation can make all the difference in the final embroidered product. Embroidery digitizing is a specialized process that translates your artwork into stitch instructions for embroidery machines, and if your artwork isn’t prepared correctly, the result can be disappointing.
In this comprehensive guide, we’ll walk you through everything you need to know about preparing your artwork for embroidery, from ideal file formats to communicating with your digitizer. Follow these steps to ensure your embroidery looks exactly as you envision.
What Is Artwork Preparation for Embroidery?
Artwork preparation is the process of optimizing your design files so that embroidery digitizers can accurately convert them into stitch files. Unlike printing, embroidery machines don’t interpret images visually. Instead, they follow precise stitch commands generated from your artwork. This means that if your artwork is unclear, low resolution, or overly complex, the digitizer will have difficulty creating a clean embroidery file.
Proper preparation helps avoid issues such as:
- Blurry or distorted embroidery
- Missing details
- Incorrect stitch directions
- Poor color matching
Ideal File Formats for Embroidery Digitizing
Starting with the right file format is essential. The digitizing software works best with clean, high-quality images that clearly define shapes and colors.
Recommended Formats:
- Vector Files: AI (Adobe Illustrator), EPS, SVG, or PDF
Vector files are ideal because they use mathematical paths instead of pixels, meaning they can be scaled infinitely without losing quality. Clean vector lines and shapes make it easier for digitizers to create precise stitch paths.
- High-Resolution Raster Files: PNG, JPG, BMP (at least 300 DPI)
If vector files aren’t available, high-resolution raster images work as a second option. Ensure the image is sharp and large enough so that details aren’t blurred or pixelated.
Formats to Avoid:
- Low-quality screenshots or images downloaded from the internet
- Small images with low resolution (less than 300 DPI)
- Files with compressed or distorted colors
Cleaning Up Your Artwork
Before submitting your design, clean it up to make the digitizer’s job easier:
- Use Solid Colors: Avoid gradients, shadows, glows, or other effects that don’t translate well into embroidery. Embroidery stitches are solid threads, so complex color blends won’t appear as intended unless specially digitized.
- Remove Backgrounds: Make sure to remove any unnecessary backgrounds or elements that won’t be part of the embroidery.
- Merge Layers: If you’re submitting layered files (like Photoshop PSD or Illustrator AI), merge all layers to avoid confusion and ensure the digitizer sees the complete design as one image.
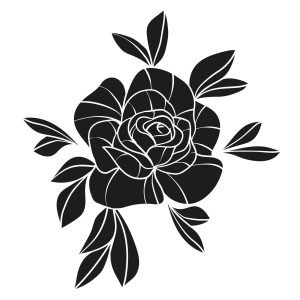
- Simplify Details: Embroidery has limitations in terms of how fine details can be stitched. Simplify intricate elements to ensure they stitch clearly.
Understand Embroidery Limitations
Embroidery differs significantly from digital printing, so keep these limitations in mind:
- Minimum Text Size: Text smaller than 0.2 inches (about 5 mm) often becomes illegible when stitched. Use bold fonts and keep text size above this minimum.
- Line Thickness: Thin lines may not stitch well and can break or disappear. Aim for lines at least 1 mm thick.
- Color Shading: Complex shading or color gradients won’t translate well unless you’re opting for advanced digitizing techniques, which can increase cost and complexity.
- Thread Count and Backing: Different fabrics and thread types affect the embroidery’s appearance and durability. Communicate your preferred thread count and backing fabric to your digitizer.
Communicate Clearly with Your Digitizer
Good communication ensures your vision is realized. When submitting your artwork, include detailed notes such as:
- Stitch Type: Do you want a flat stitch, satin stitch, or 3D puff embroidery? Each has a different look and feel.
- Garment Type: Let the digitizer know if the embroidery will be on hats, jackets, polo shirts, or other items, as each fabric and location may require different stitching techniques.
- Size: Specify the exact size you want for the final embroidery. This helps the digitizer scale the design appropriately.
- Color Preferences: If you have specific thread colors in mind, provide Pantone or thread color codes.
Final Tips for a Successful Embroidery Project
- Ask for Advice: Many digitizing services, like Quality Care Digitizing, offer free consultations before converting your design. Don’t hesitate to ask if your file is suitable or if adjustments are needed.
- Request a Sample Stitch-Out: Before committing to a large order, request a sample embroidery to check the quality and make any necessary changes.
- Provide Feedback: If the first digitized file isn’t perfect, communicate clearly what needs to be improved.
Conclusion
Preparing your artwork properly is the foundation of beautiful, professional embroidery. By starting with the right file formats, cleaning up your design, understanding embroidery limitations, and communicating clearly with your digitizer, you can ensure your embroidered products look exactly how you envision. Whether you’re a brand owner or a designer, investing time in artwork preparation will save you time, money, and frustration in the long run.
Ready to bring your designs to life with embroidery? Start with clean, high-quality artwork and partner with a trusted digitizing service to make your vision stitch-perfect!