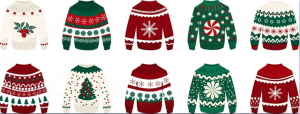
Logo for Embroidery Online
18

Feb

How to Digitize Your Logo for Embroidery Online: Easy Steps for Perfect Stitching

Title: How to Digitize Your Logo for Embroidery Online: Easy Steps for Perfect Stitching

Are you looking to give your brand a professional edge with embroidered logos? Digitizing your logo for embroidery is the first step towards creating high-quality stitched designs that will make your brand stand out. Fortunately, with online services, the process has never been easier or more affordable.

Here's a simple guide on how to digitize your logo for embroidery online, ensuring the best results for your branding needs.

  1. Choose the Right Service: Start by selecting the best embroidery digitizing service online. Look for reliable providers that offer affordable vector art services and specialize in digitizing logos for embroidery. Research is crucial here to ensure you get the quality and affordability you need.
  2. Prepare Your Logo: Before digitizing your logo, make sure it's in the right format. Vector files like .ai, .eps, or .svg work best as they can be easily scaled without losing quality. If you don't have a vector file, a high-resolution image (300 DPI or higher) can also suffice.
  3. Select the Stitch Type: Discuss with the digitizing service which stitch type would best suit your logo. Depending on the complexity and design elements, they may recommend satin stitches, fill stitches, or a combination of both to achieve the desired look.
  4. Upload Your Logo: Once you've chosen the service and prepared your logo, upload the file to their platform. Most online digitizing services have user-friendly interfaces that make the process quick and straightforward.
  5. Specify Details: Provide specific instructions regarding the size, colors, and any other preferences for your embroidered logo. Clear communication ensures that the digitizer understands your requirements and delivers the results you envision.
  6. Review the Proof: After digitizing your logo, the service will typically provide a proof for your review. Take this opportunity to carefully inspect the design, paying attention to details like stitch density, alignment, and overall appearance.
  7. Request Revisions if Needed: If there are any aspects of the digitized logo that don't meet your expectations, don't hesitate to request revisions. Good digitizing services value customer satisfaction and will work with you to make necessary adjustments until you're happy with the final result.
  8. Approve the Final Design: Once you're satisfied with the digitized version of your logo, approve the final design. At this stage, the service will provide you with the necessary files for embroidery, typically in formats like .DST, .PES, or .EMB.
  9. Choose Your Fabric and Thread: Consider the type of fabric and thread colors you'll be using for the embroidery. Different materials and colors can affect the appearance of the stitched logo, so make sure they complement your brand's aesthetic.
  10. Embroider Your Logo: Finally, it's time to embroider your logo onto your desired items, whether it's polo shirts, hats, jackets, or bags. If you're not familiar with embroidery machines, you can always seek assistance from local embroidery shops or online tutorials.

In conclusion, digitizing your logo for embroidery online is a convenient and cost-effective way to elevate your brand's image. By following these simple steps and working with reputable digitizing services, you can achieve professional-looking embroidered logos that leave a lasting impression.

Remember, for the best results, choose a provider that offers both affordable vector art services and top-notch embroidery digitizing services. With the right partner, you can showcase your brand with confidence through beautifully stitched logos on a variety of promotional and apparel items.

Don't wait any longer—digitize your logo for embroidery today and take your brand to the next level!

Share this post

Leave a Reply

Your email address will not be published. Required fields are marked *


RELATED

Posts

30 Oct

SVG to Inkstitch Conversion Explained: Best Practices for Embroidery

The art of digital embroidery is fascinating, and knowing how to convert SVG files to Inkstitch can elevate your designs. No matter your experience level, this guide from QualityCare will walk you through the process. Using Inkscape and Inkstitch, you’ll optimize your designs for embroidery machines and achieve professional results.SVG:...

read more
26 Oct

Embroidery vs Cross Stitch Key Differences & Best Technique for You

For centuries, embroidery and cross stitch have been popular forms of needlework. Although they share some similarities, each technique has unique characteristics, making them suitable for different types of projects. Understanding these differences helps both beginners and experienced crafters choose the best method for their workEmbroidery: what is it?Embroidery refers...

read more
23 Oct

How to Make an Embroidered Badge – Easy DIY Guide

Embroidered badges add a professional and personal touch to clothing, accessories, and crafts. With the right tools and guidance, making your own badge is simple and fun. This guide from Qualitycare will walk you through the process step-by-step, helping you create beautiful and durable embroidered badges for teams, clubs, or...

read more
5 Oct

How to Remove Embroidery Safely: Expert Tips for Fabric Protection

Embroidery adds style, texture, and personality to clothing and accessories. But sometimes, you might want to remove it—maybe there’s a stitching error, a logo change, or you just want to reuse the fabric. Whatever the reason, removing embroidery safely is essential to prevent fabric damage. With insights from experts at...

read more
5 Oct

3D Embroidery How to Add Dimension & Depth to Your Designs

3D embroidery turns a flat design into something that literally stands out. It adds texture, shape, and a bold raised look that grabs attention. Whether you’re decorating caps, jackets, or custom apparel, 3D puff embroidery gives your logo or art a sculpted finish that looks professional and premium.In this guide,...

read more
5 Oct

Improve Your Embroidery Skills with Looping Stitches

Looping stitches add movement, texture, and life to embroidery. They turn flat designs into dynamic, eye-catching artwork. Whether you’re working on fashion pieces, decorative hoops, or custom patches, mastering looping stitches helps you elevate every design.This guide will walk you through what looping stitches are, how to use them, and...

read more
5 Oct

Custom Patches Backing Guide: Types, Uses & Best Picks

Custom patches do more than just decorate clothing — they express identity, represent organizations, and strengthen brand visibility. Every custom patch needs the right backing to stay secure, maintain its shape, and last long.At Quality Care Digitizing, we understand that the perfect backing gives your patch strength, flexibility, and a...

read more
30 Aug

Why Scalable Embroidery Designs Save Time and Money for Businesses

Scalable embroidery designs are essential for businesses that want consistent, high-quality results across multiple products. Designs that can scale up or down without losing clarity save time, reduce costs, and maintain brand consistency. Whether you are producing small left-chest logos or large jacket backs, proper scalable designs minimize errors and...

read more
29 Aug

5 Common Embroidery Design Issues That Hurt Results (and How to Fix Them)

Embroidery looks amazing when designs are digitized correctly, but even small mistakes can create big problems. Many beginners and even businesses face embroidery design issues that lead to wasted fabric, broken threads, or poor branding. With help from embroidery digitizing services, vector art services, and 3D embroidery digitizing, you can...

read more